Intro to Building Templates
An overview of what it means to create or modify templates.
Written By Patrick
Last updated 4 months ago
The ability for the end user to create their own template is foundational to Mercury. With no coding, the template on screen can be modified or made from scratch.
Modifying Standard Template
Standard templates are available for every tool, but sometimes changes are needed based on project needs. At the project level start by opening the tool options and selecting Duplicate next to the template you’d like to modify. Once you give it a new name, you’re free to add new sections and insert inputs.
Creating a New Template
At the project level, start by opening the tool options and selecting Create New on the upper right. Start by naming the first section and starting and inserting new inputs.
Standard Input Properties
These are the aspects that carry across many of the inputs.
Label:
This is the text that appears just left of the field in the template.

Placeholder:
The text that sits in the field prior to the user typing in it.

Required:
This will require the field to be populated PRIOR TO SAVING the form. This will put a Red asterix next to the field.
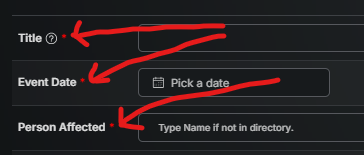
Required to Create:
This will require the field to be populated PRIOR TO PUBLISHING the form. So you could save but not publish with these fields blank. This will put a White asterix next to the field.
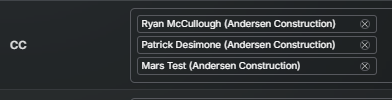
Allow Multiple:
For inputs that select from a list, this flag allows the user to select more than one option for a single field. *Allow Multiple for Checklist items does work differently.
Good to Know
Individual inputs on Company Standard templates cannot be modified. New sections have to be inserted.
Make sure to set Permissions on New Templates so the correct roles can view or edit.